
Get ready to elevate your quoting game and bring your sales efforts to new heights.
Creating compelling quotes is crucial for success in modern sales and business. With its powerful tools and features, HubSpot makes this process more efficient and effective. Join us as we delve deep into HubSpot's quoting capabilities, providing you with the knowledge and strategies to craft persuasive and professional quotes that close deals.
Key Topics:
Creating a Quote Document
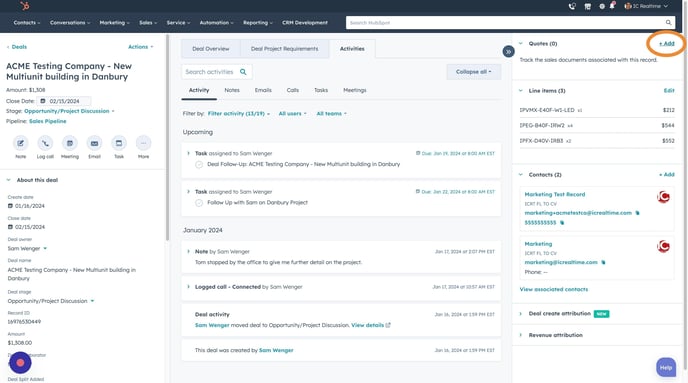
Ready to generate a quote? The great news is that half of the groundwork has already been completed during the creation of your deal! Now, all that's left is fine-tuning the product details, numbers, and discounts before sending out a polished proposal.
- To begin, click the "Add" button at the top right corner of your deal record.
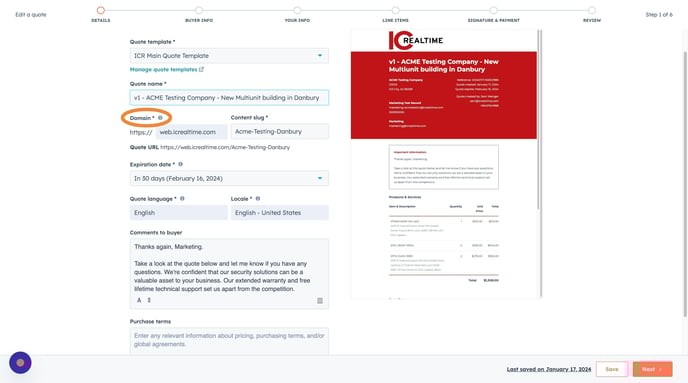
Quote Name
- The quote name has automatically been populated to match the deal name you initially created. However, feel free to personalize the name as needed.
Pro Tip: Consider adding 'v1', 'v2', and so on at the beginning of the quote name. This will help you easily distinguish between different versions of quotes and identify the latest one you're currently working on.

Domain Name
- The Domain 'Content Slug' is automatically generated, but you have the flexibility to customize it for your convenience.
Pro Tip: Opt for a content slug related to the project, avoiding special characters. Instead, use hyphens to separate words, making it easily memorable.
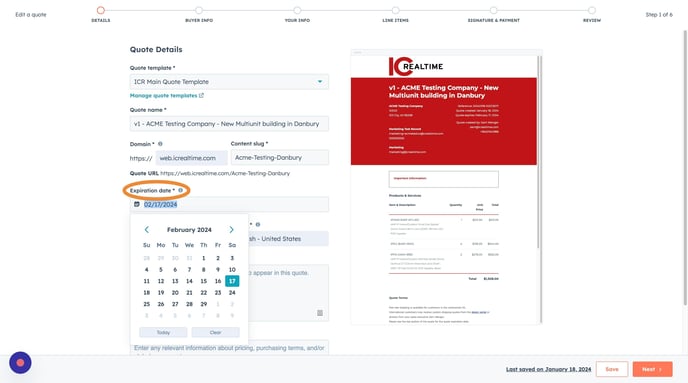
Expiration Date
- Following the default 30-day expiration date, customizing the quote's expiration date becomes pivotal in the quoting process.
- This is a way to leverage it as your tool to expedite the deal-closing process, and instill a sense of urgency, pushing dealers to make a decision within a designated timeframe.
- You can adjust this date to a timeframe that suits you and your dealer by clicking into the field and selecting a date.
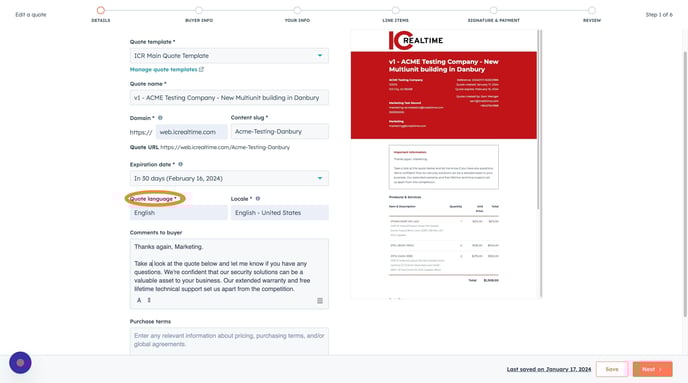
Quote Language and Locale
- The quote language and locale are pre-set, so you don't need to make any adjustments in this section.
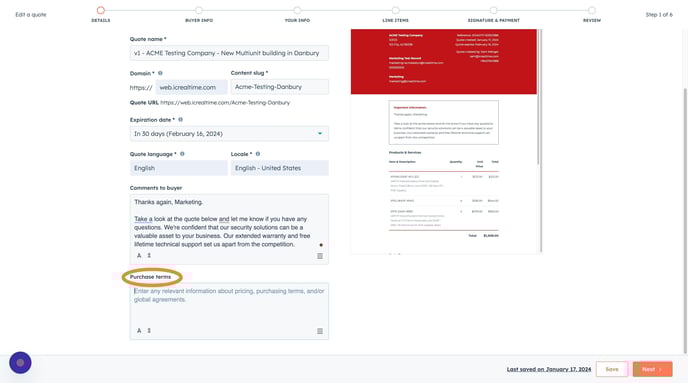
Comments to Buyer
- In the 'Comments to Buyer' field, you can leave a personalized note to your dealer regarding the project.
- You can also take advantage of this opportunity to emphasize your value propositions.
Pro Tip: If you're unsure what to say, click on the snippet icon at the bottom right of the text box. From there, you can choose 'message to dealer' to access a pre-made template to help you get started.
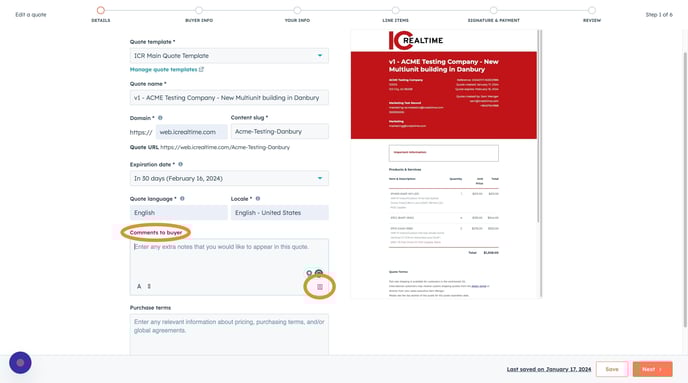
Purchase Terms
- The 'Purchase Terms' field is meant for internal communication with the operations team when your quote is ready for processing.
- Since this example quote we're creating has yet to be ready for processing, we'll skip this field and delve into it in more detail in our upcoming lesson.
Buyer Info
- You've completed the first step of your quote creation.
- Click "Next" to proceed and add your buyer's information.
- The buyer information is automatically populated based on the contacts you've included in your deal.
- However, you can choose whether to include all the contacts, uncheck those you don't want to include, or add any additional contacts.

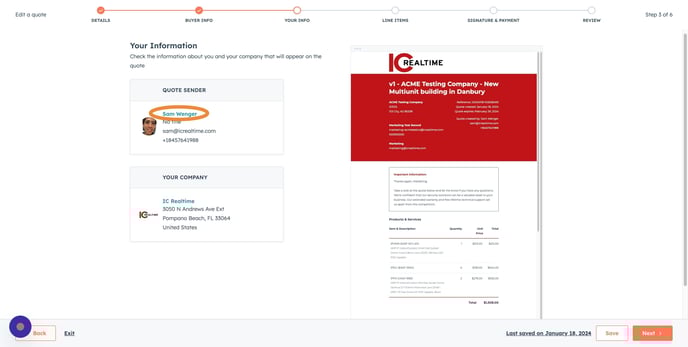
Your Info
- Now, let's review the details about you and your company that will be featured in the quote.
- There's typically no need for you to make any more modifications here, since this data is sourced from your profile settings.
- You can tailor this section for the specific quote by clicking Your Name or Company Name. Your preset profile settings will remain unchanged.
- Simply click "Next" to start fine-tuning the elements of your quote.
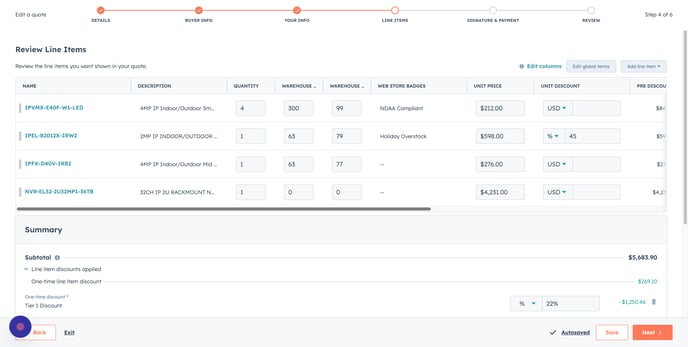
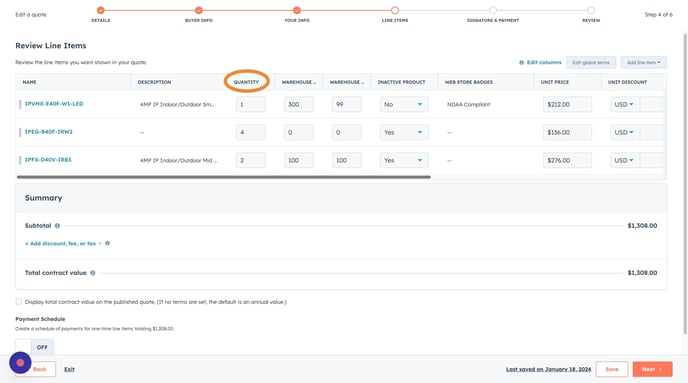
Line Items
- Welcome to your line items stage. This is where you can select quantities, incorporate discounts, and, in the end, determine the total amount for your quote.
Note: If you've previously included line items in your deal, they will automatically appear in this column, allowing you to remove or add items as needed.
Adding Line Items
- Let's go over the process of adding a line item and then proceed to the next step.
Here's the step-by-step:
-
Click "Add Line Item" at the page's top right.
-
Click "Select from product library."
- Here you can
- Manually enter the part number you wish to select
- Search for a specific item number
- Browse/Sort through the items (sorting by price or name).
- Once you've found the part you want to add, select it and click on "add."
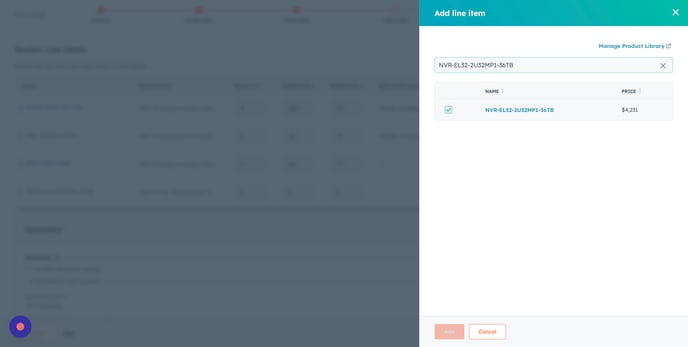
🎉 Your new item has been successfully added to the quote. 🎉
Name Column
- The first column you'll see is labeled "Name"
- This column represents the product SKU and or the part number.
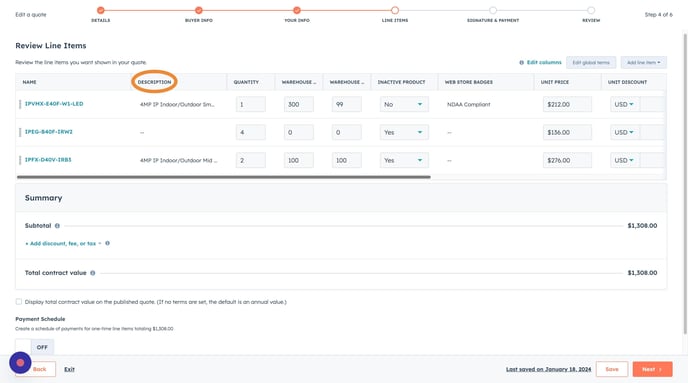
Description Column
- A short product description containing product specifications is next to the "Name" column.
Quantity Column
- On the right-hand side of this description is where you can fine-tune the quantity for each item.
- To make quantity adjustments, click within the quantity field and modify the number to your desired quantity.
Warehouse Inventory
- In the next two columns, you'll see product inventory levels for both Florida and Arizona warehouses.
- Use this to check stock availability and ensure the most efficient fulfillment process.

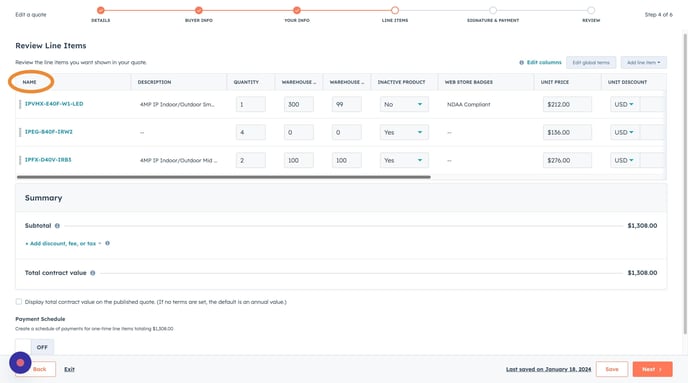
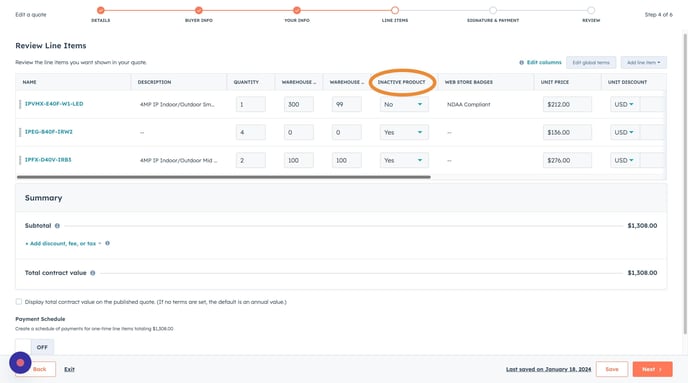
Inactive Product
- The next column, "Inactive Product," displays the current status of each item:
-
"Yes" signifies that the item is inactive.
-
"No" indicates that the item is active.
-
Items might be marked as "Yes" (inactive) for various reasons, such as:
-
-
Has inventory but not yet ready for sale due to ongoing testing by the product team
-
Awaiting inventory depletion of the prior version
-
Discontinuation of the product
-
This column holds significance as it directly impacts whether operations receive the quotes and if the products can be shipped. It's essential to double-check this column before sending your quote to make sure that the dealer sees products that are 100% available.
Web Store Badges
- The following column is for web store badges, also known as call-outs.
- These badges are added to SKUs with promotions or to highlight important features.
- We'll attach a SKU to a promotion within this training so you can see how it works.
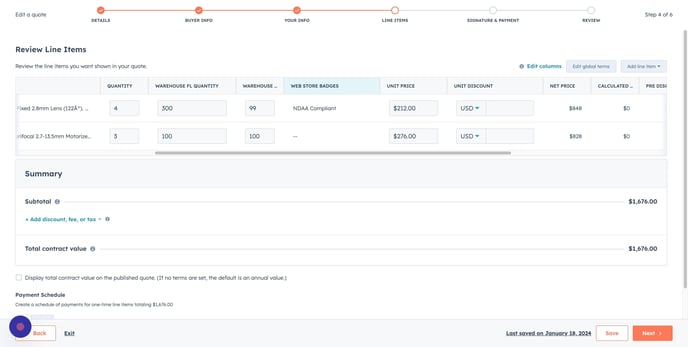
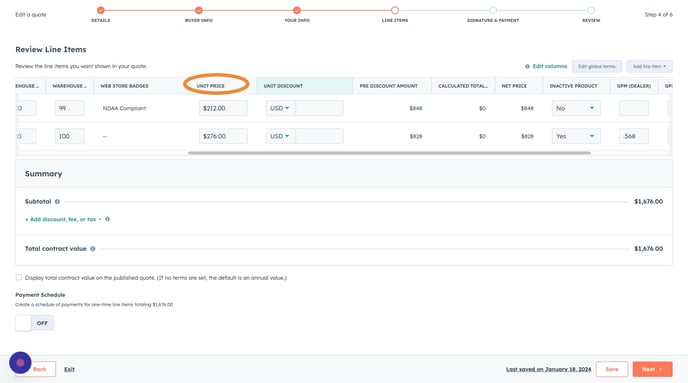
Unit Price
- The unit price column is the standard U.S. Dealer Price (this price does not include any special group, dealer, or tier discounts)
Unit Discount
- After the "Unit Price," you'll see the "Unit Discount" column, which allows you to enter discounts or promotions linked to a particular part.
- See an example of applying a unit discount below.
Note: This section should not include special tier or group pricing, as this information will not sync to NetSuite for processing. Any additional discounts should be applied to the subtotal or included in your purchase term notes for the operations team.
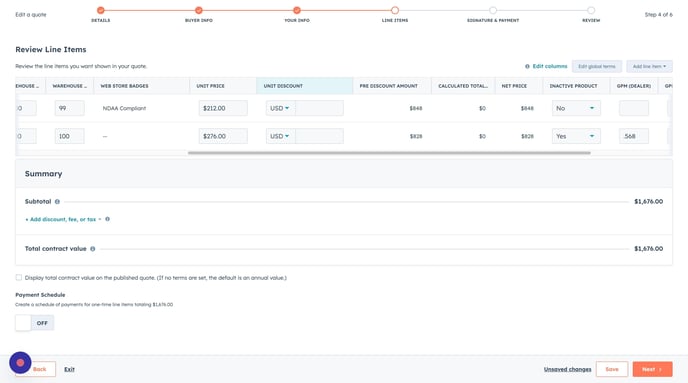
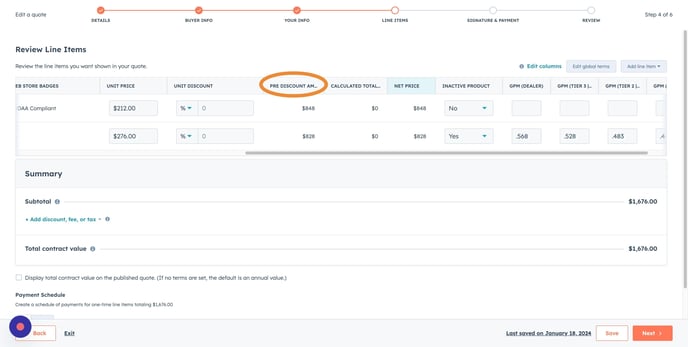
Pre Discount Amount
- The "Pre-Discount Amount" shows the total cost of items before any discounts.
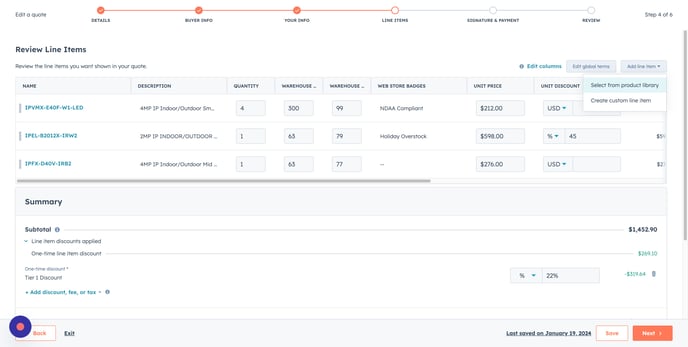
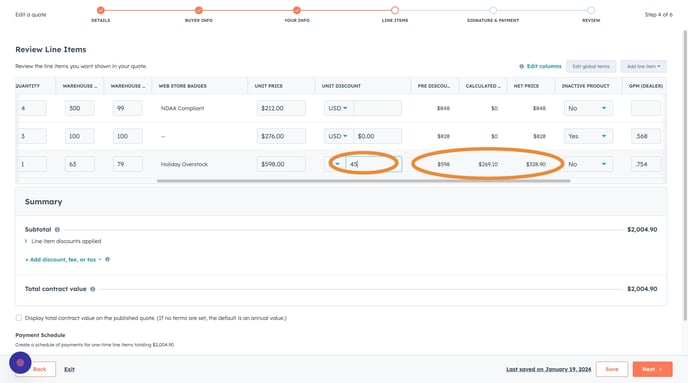
Unit Discount Example
In the example image below:
-
I selected an item from our "Holiday Overstock" promotion, which provides a 45% discount on specific parts.
-
The "Web Store Badges" correctly identified this item as "Holiday Overstock."
-
I included the "Unit Discount" amount at 45%, representing the amount the item qualifies for the promotion.
-
As a result, you'll notice that the "Pre-Discount," "Calculated Total Discounts," and "Net Price" columns on the right adjust accordingly to reflect the 45% discount.
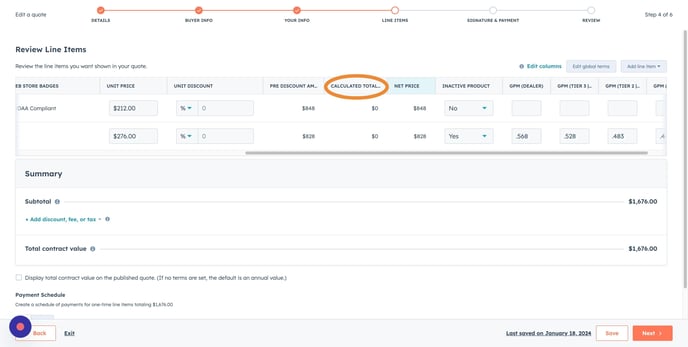
Calculated Total Discount
Net Price
- The "Net Price" column represents the final cost after all discounts are accounted for
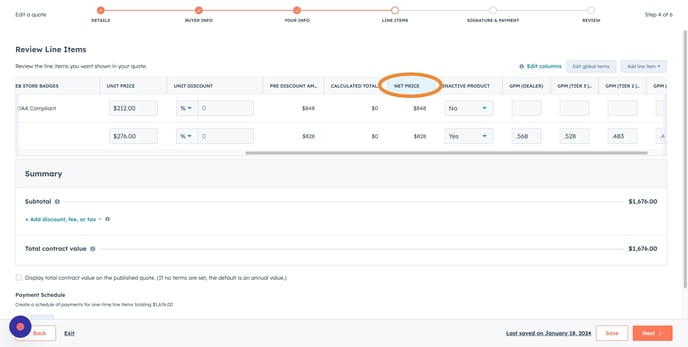
GPM
- The final four columns represent estimated gross profit margins, indicating the estimated profit margin based on the product's selling price:
-
"GPM (Dealer)" illustrates the profit margin at the standard dealer price.
-
"GPM (Tier 3)" signifies the profit margin at a 7% discount.
-
"GPM (Tier 2)" represents the profit margin at a 15% discount.
-
"GPM (Tier 1)" showcases the profit margin at a 22% discount.
-
Applying Dealer Tier Pricing
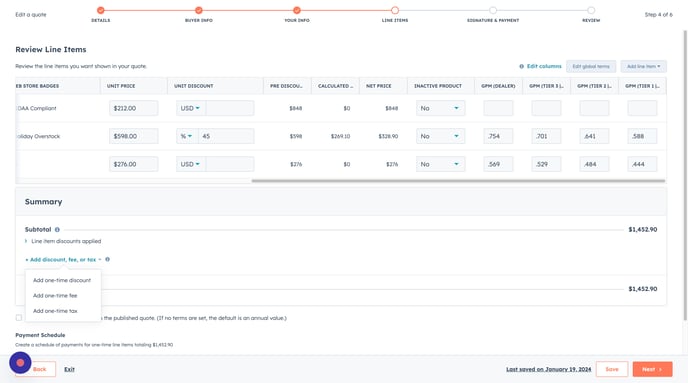
- Since NetSuite is our central ERP system, including tier pricing in the quote is crucial to align with NetSuite pricing that applies automatically. Follow these steps to apply the discount:
- Scroll down to the "Subtotal" section at the bottom of the quote
- Click "Add discount, fee, or tax."
- Click "Add one-time discount."
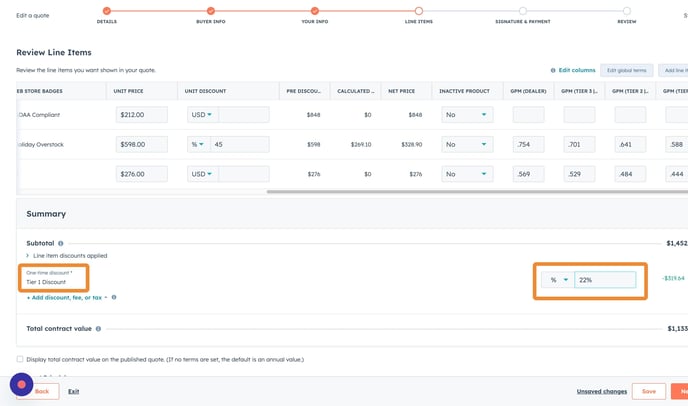
-
Within the "One-Time Discount," enter a name in the field to indicate the dealer's tier for example. "Tier 1 Discount".
-
Click the dropdown menu labeled "USD" to the right
-
Enter the tier discount amount; the example shows "22%."
Pro Tip: If you're uncertain about your dealer's tier, you can find tier pricing details listed in the company profile on the left column or within the Company Summary tab.
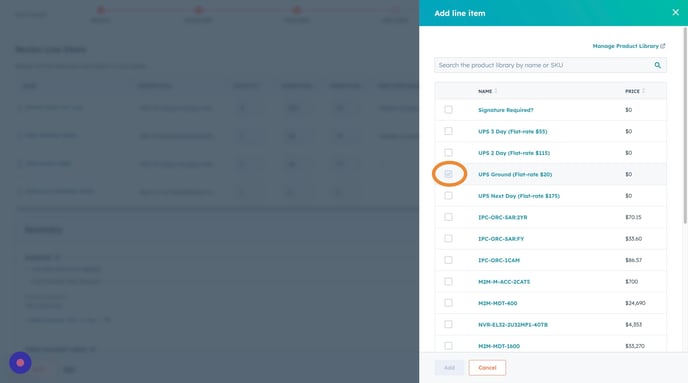
Shipping + Taxes
- As shipping costs will be factored in during the order processing phase, it's best to include the flat shipping price as a separate line item, ensuring the dealer is aware of the cost that will be included during the order processing phase.
-
To achieve this, follow the same process as adding a line item, but this time,
- Select from the initial group of line items, specifically the items that begin with "UPS."
- Lastly, click add.
Note: If the dealer requests a signature at delivery, select the "Signature Required" item.
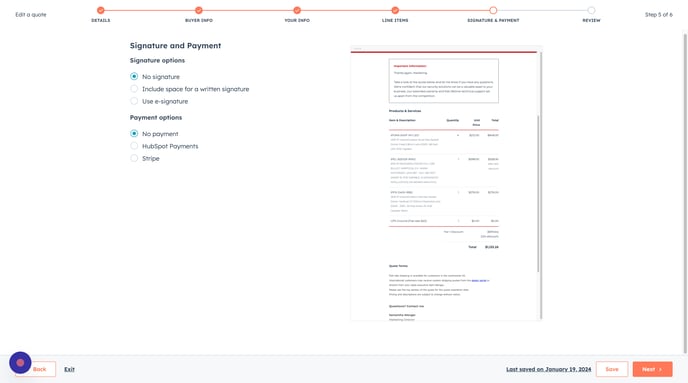
Signature & Payment
- As we do not require signatures, and payments will be processed in NetSuite, you can click "Next" to move on to the final step.
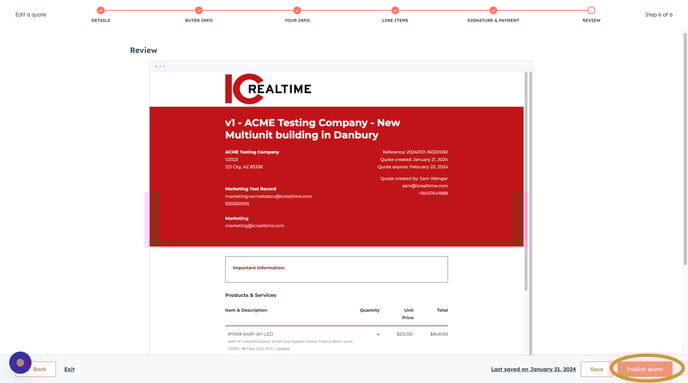
Final Review and Publishing Quote
You've reached the final step!
- Here is where you can review the quote and click "Back" to make any essential adjustments if needed.
- Once you're done, click "Publish Quote."
It's essential to communicate the following with the dealer:
- Shipping and taxes will be calculated and added to their final invoice
- They will not be charged these fees if they are tax-exempt or qualify for free shipping.
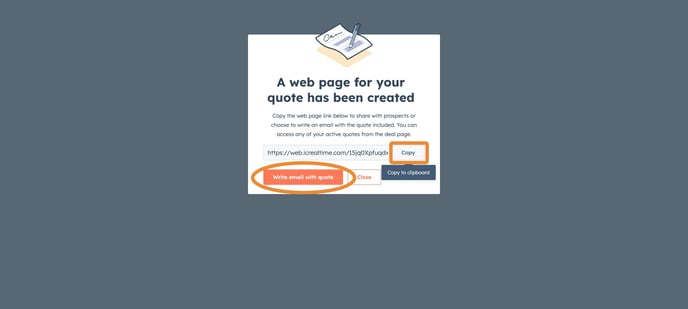
🎉 Congratulations! Your quote has been published!🎉
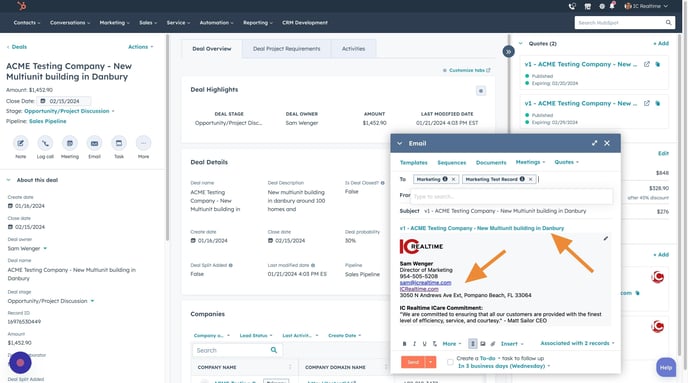
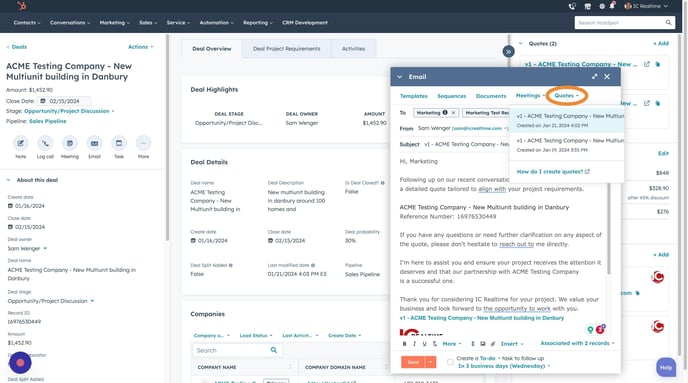
Emailing Quote
You now have the choice of either:
- Copy the quote link and send it directly from your email
- Click "Write an email with a quote," which will open a window allowing you to send the quote instantly through HubSpot
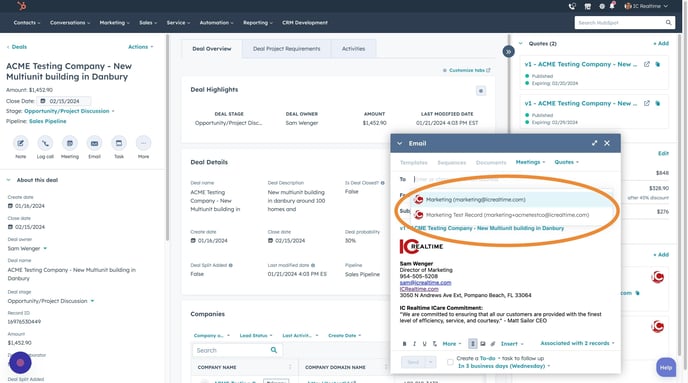
To Field
- If you've opted for the "write email with quote" option.
- An email window will open at the bottom of the deal record.
- When you click the "to" field, it will display only the contacts associated with the quote; select the contact email(s) to which you want the quote sent.
Body of Email
- The body of the email includes a link to the quote in the body, along with your contact information. You can customize it by including a personalized message or using a snippet.
Using Templates (Snippets)
- Click "insert," then "snippet,"
- Select a snippet you created or choose a standard "Email Quote Template."
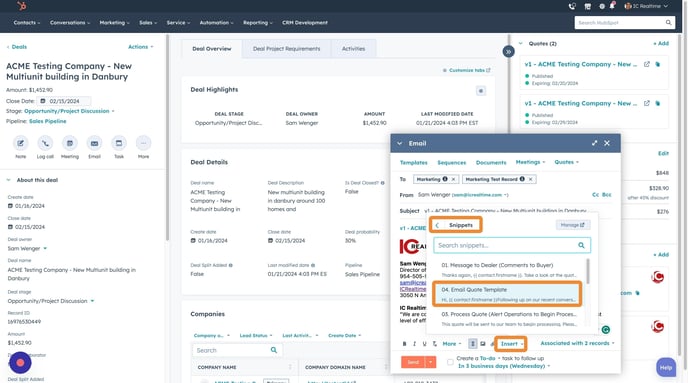
Insert Quote Link
- Click "quote" at the top of the email window, and a dropdown will appear.
- Select the quote you wish to send, which will be included as a link in the email.
When you're ready, click "send," and your quote will be sent off to the dealer!
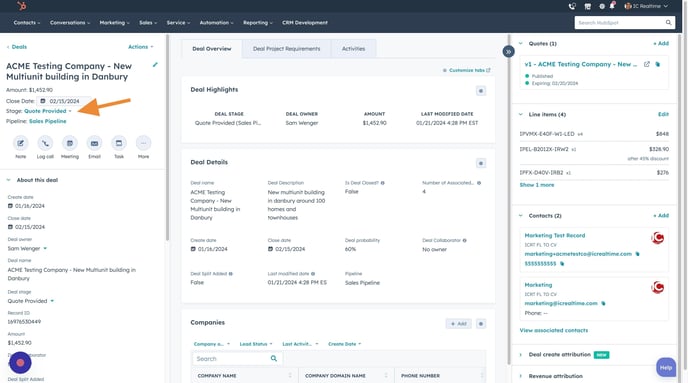
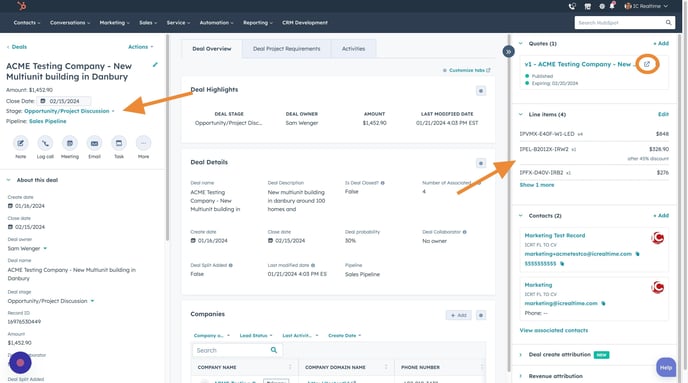
Post Published Quote
Your quote has been sent! You are now back at your deal record.
You'll notice that the "Amount" in the deal record has been updated to match the total in your quote.
If you need to review your quote again, click the quote link on the top right of the page, and it will open the published quote.
Your quote has also progressed to the next stage in your pipeline.
Deal Stage Change
To see the deal stage change, refresh the deal record after a few minutes, and you'll notice the deal stage updates to "Quote Provided"
Signature & Payment
As we do not require signatures, and payments will be processed in NetSuite, you can click "Next" to move on to the final step.
Final Review and Publishing Quote
You've reached the final step!
- Here is where you can review the quote and click "Back" to make any essential adjustments if needed.
- Once you're done, click "Publish Quote."
🎉 Congratulations! Your quote has been published 🎉
Emailing Quote
You now have the choice of either copying the quote link and sending it from your direct email or simply clicking "write an email with a quote," which will open a window allowing you to send the quote directly.
To Field
- If you've opted for the "write email with quote" option.
- An email window will open at the bottom of the deal record. Here's how it works.
- When you click the "to" field, it will display only the contacts associated with the quote; select the email(s) to which you want the quote sent.
Body of Email
- The body of the email includes a link to the quote in the body, along with your contact information. Include a personalized message or use a premade snippet.
Using Templates (Snippets)
- Click "insert," then "snippet," and choose a snippet you created or use the premade "Email Quote Template."
Shortcut to Quote Link
- Click "quote" at the top of the email window, and a dropdown will appear.
- Select the quote you want to send, which will be included as a link in the email.
📤 When you're ready, click "send," and your quote will be emailed to the dealer!
Post Published Quote
Your quote has been sent! You are now back at your deal record.
Review Changes to Deal Record
- You'll notice that the "Amount" in the deal record has been updated to match the total in your quote.
- If you want to review your published quote again, click the quote link on the top right of the page, and it will open the published quote.
- Your quote has also progressed to the next stage in your pipeline.
- To see the deal stage change, refresh the deal record after a few minutes, and you'll notice the deal stage updates to "Quote Provided."
HubSpot Academy
Learn More on HubSpot Academy!
Take a deeper dive into your HubSpot Contact and Companies views.
Sign Up for HubSpot Academy
Course: Closing Sales in HubSpot